Deploying courses to headsets
In the Content tab of the Strivr Portal, you can deploy courses to any or all of your company’s headsets. Once courses are scheduled for deployment, they are transmitted when headsets are connected to the Internet and may take several hours to begin and complete. Your company may have defined windows during which content can be downloaded.
NOTES:
- If your company uses a Mobile Device Manager like Workspace ONE (and depending on internal policies at your company), the MDM admin may need to approve each course download from Strivr.
- Courses that contain content that requires app bundles are denoted by a package icon
. Learn more about app bundles here.
-
From the Content menu in the top bar, select Deploy.
-
Select one or more courses.
-
Click a course to select it. Selected courses are highlighted in blue.
-
If you have many courses, search by course name to narrow the list.
-
You’ll see the total number of selected courses at the bottom right of the screen.
-
Click Next.

NOTE: Only approved courses appear in the list.
-
-
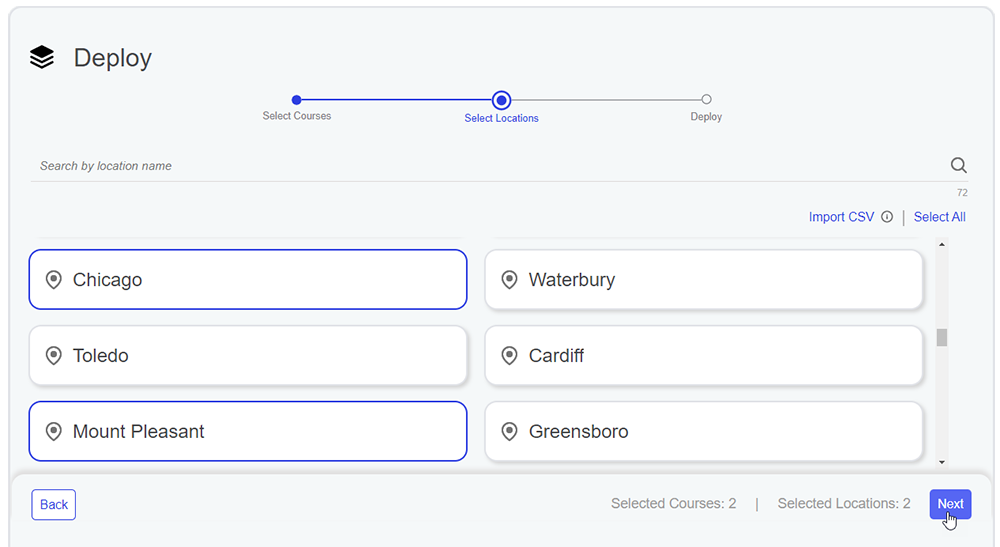
Select locations to which you want to deploy the selected courses. Selected courses will be deployed to all headsets that belong to the selected locations.
-
Click a location to select it. Selected locations are highlighted in blue.
-
If you have many locations, search by location name to narrow the list.
-
You can also upload a CSV-format list of locations you wish to select. This can be useful if you have many locations but do not want to deploy content to all of them. Note that location names must exactly match location names defined for your company or they will be excluded. Each location must appear on its own line in the file.
-
You’ll see the total number of selected locations in the bottom right of the screen.
-
Click Next.
-
-
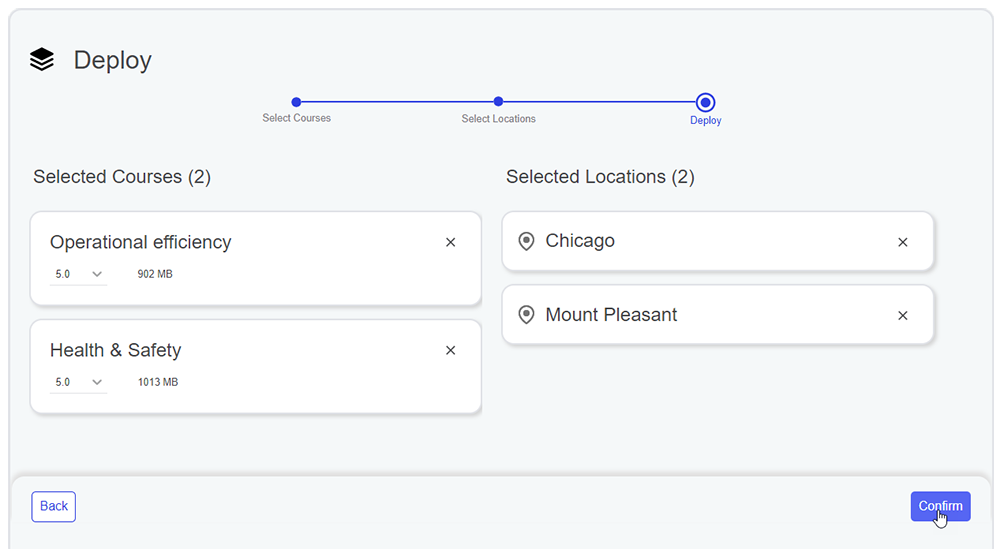
Review the list of courses that will be deployed and the locations to which the courses will be deployed. Remove a course or location from the deployment by clicking the X.
-
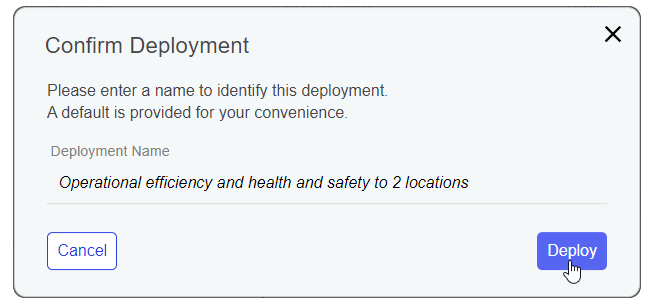
Enter a name to identify this deployment and click Deploy. You can click Cancel to change your mind and return to the previous step.