Building a course
NOTE: Depending on your permissions, you may not be able to build courses. If you think you need a different level of access, talk to your Strivr Account Executive.
In the Strivr Portal, you can build courses that you can then deploy to your company’s headsets. Courses consist of one or more modules, and modules consist of one or more pieces of content. Content is authored in Strivr Creator (or other third-party tools) and saved to your Content Library. Note that when you create a new course, it is a draft and cannot be deployed to headsets until marked as Approved on the Course Catalog page.
-
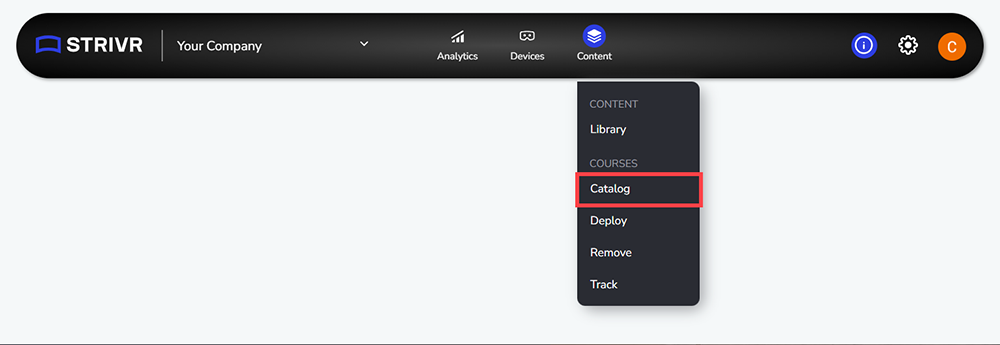
From the Content menu in the top bar, select Catalog.
-
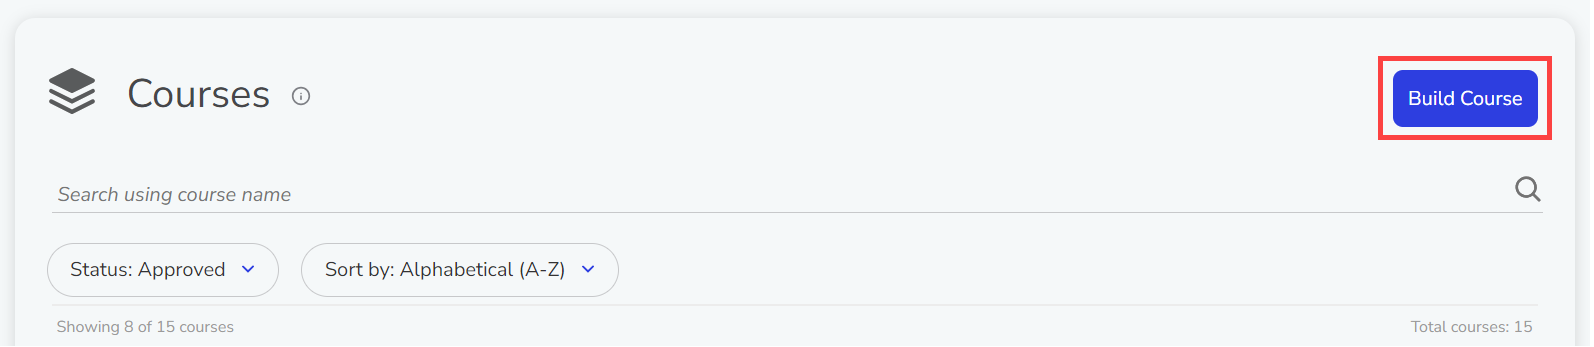
Click Build Course.
-
Fill in information about your new course. Required fields are marked with a red asterisk.
Course name and image appear in course details in the Strivr Portal and in learner headsets in training menus; course name identifies the course for selection during course deployment; course description appears only in course details in the Strivr Portal.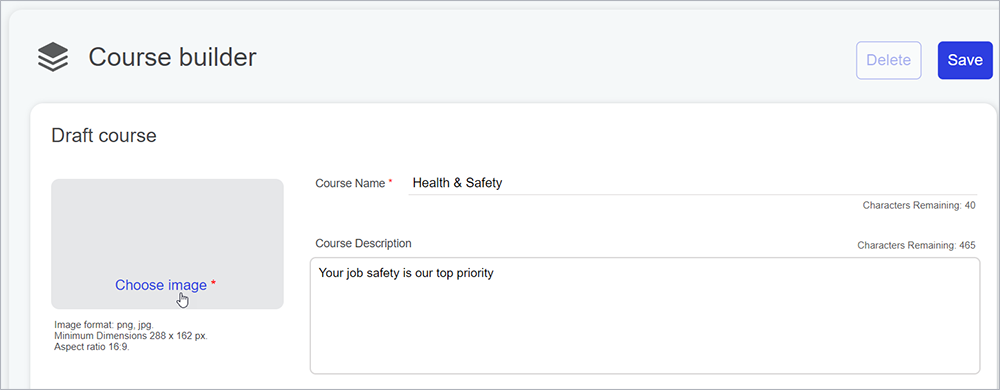
-
Enter a name for your course.
-
Click Choose image and select an image from a local drive. Images must be in PNG or JPG format, with minimum dimensions of 288px x 162px. For best results, images should be in 16:9 aspect ratio (width 16 to height 9).
-
Enter a course description.
-
-
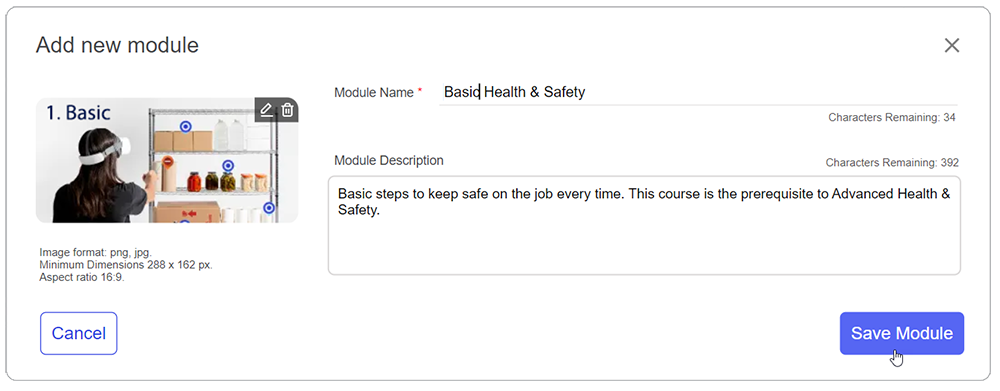
Click Add Module.

-
Fill in information about the module. Required fields are marked with a red asterisk.
Module name appears in course details in the Strivr Portal and in learner headsets in training menus; Module image and description appear in course details in the Strivr Portal.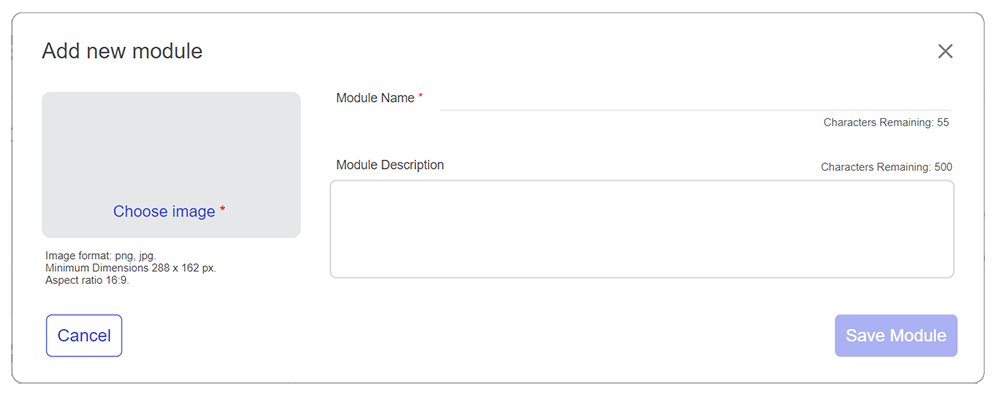
-
Enter a name for your module.
-
Click Choose image and select an image from a local drive. Images must be in PNG or JPG format, with minimum dimensions of 288px x 162px. For best results, images should be in 16:9 aspect ratio (width 16 to height 9).
NOTE: Strivr Player versions after 3.0 do not show the Module image in training menus learner headsets.
-
Enter a module description.
-
-
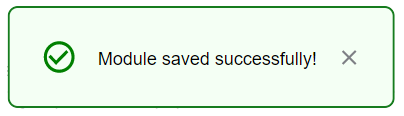
Click Save Module.
You’ll see a message that the draft was saved successfully.
-
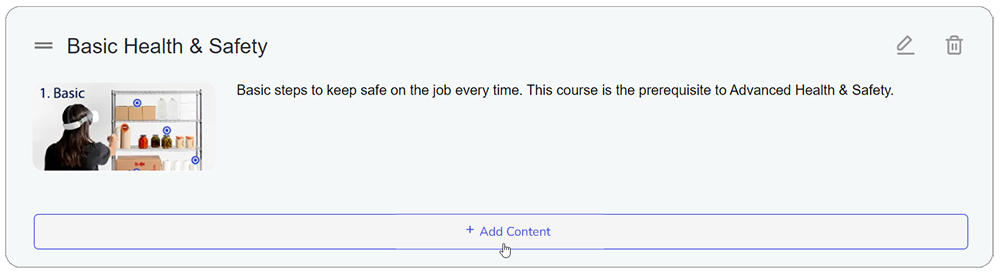
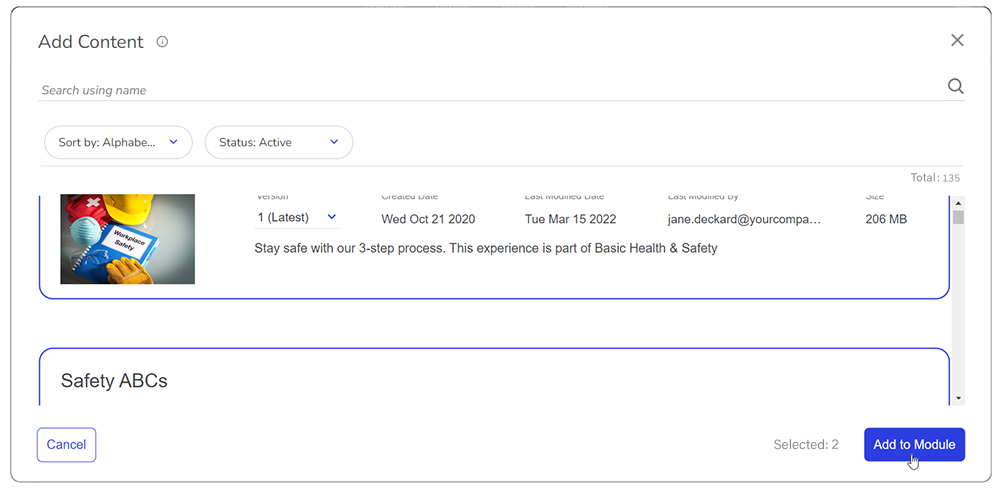
To select pieces of content to add to this module, click Add Content.
-
From the list of content, click one or more. Selected pieces of content are highlighted in blue.
-
Click Add to Module.
-
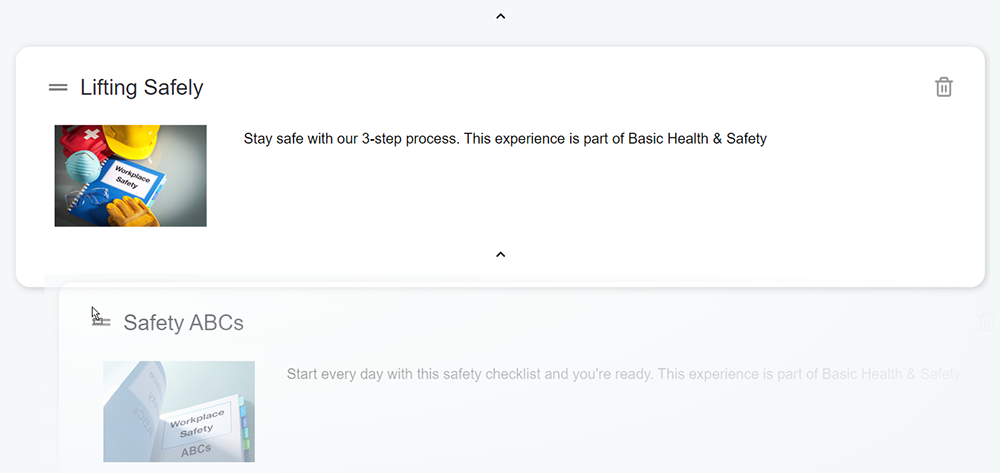
You'll return to the course. Click the down arrow in a module to expand the list of content it contains.
-
-
You can build out your course with more modules and content using the Add Module and Add Experience buttons
-
To change the order of modules within a course or pieces of content within a module, click and drag them to the new location. This is the order they will appear in the headset.
-
When you’re happy with your course, click Save at the top of the page. Your course will now appear in the Content Library as a draft. If you’re ready for the course to be reviewed by your internal team, use the Save drop-down to select Save and Publish.
NOTE: The Publish command is not available until all required fields are filled out and the course contains at least one module and one experience.