Connecting the headset to wifi
If your Strivr Immersive Learning System is a stand-alone Pico Neo 3, Pico G2, or Pico G2 4K headset, and your company does not use a Mobile Device Management system, you may need to connect the headset to Wifi from within the headset the first time you use it at a new location.
NOTE: Wifi connection is not required to use Strivr training. However, the headset must connect to the network for a learner to receive credit for training and to transmit and receive data. If you’re not sure about your Wifi network or password, consult your IT or Workspace ONE administrator.
-
Put the headset on.
-
 For Strivr Player version 3.10 and later:
-
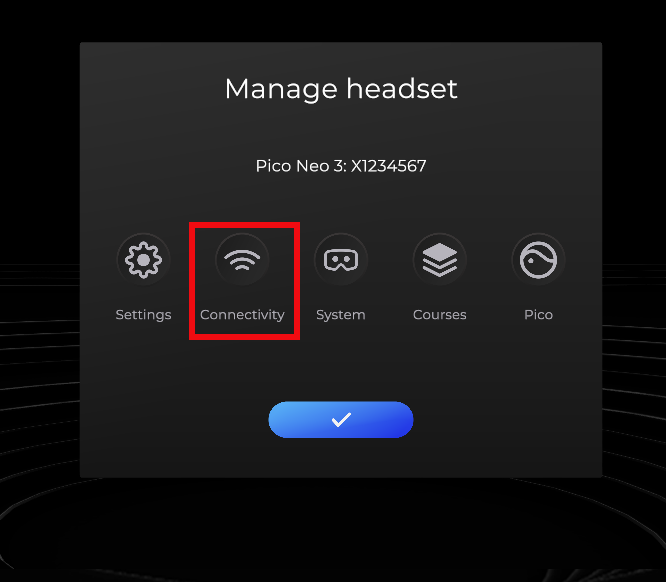
From the quick menu in Strivr Home, select the Connectivity icon.
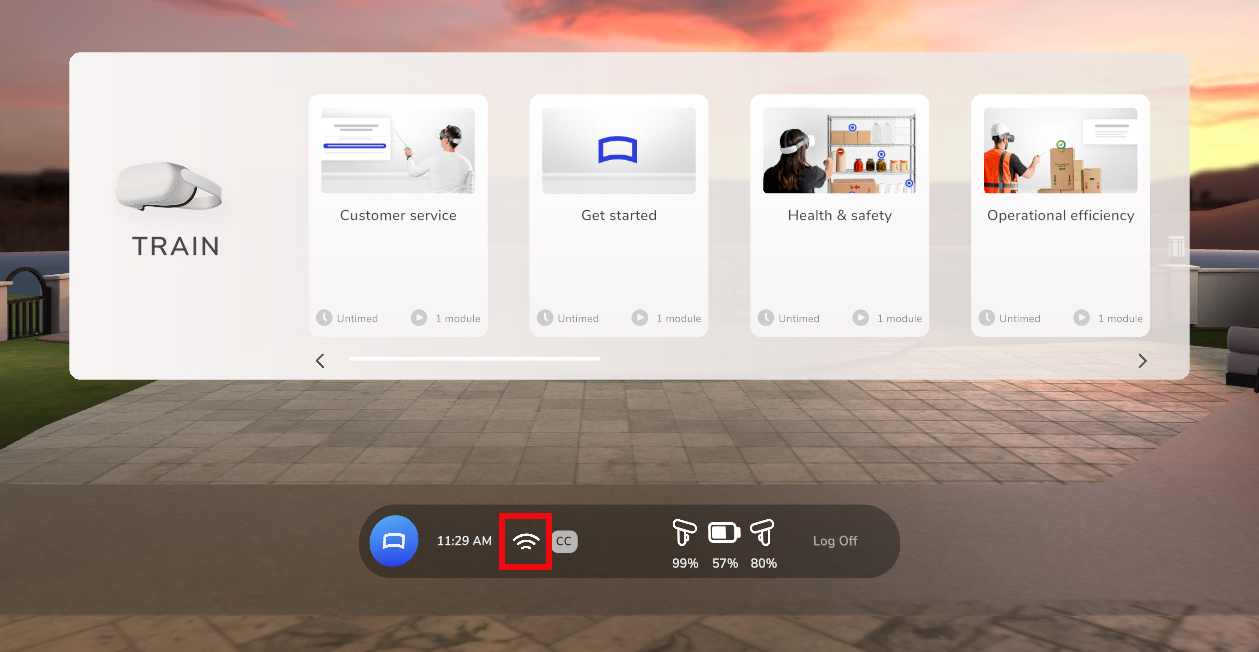
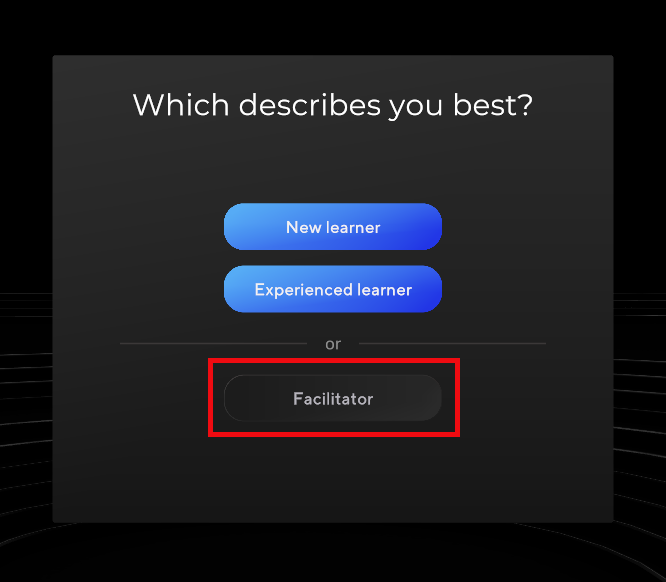
NOTE: If the Connectivity icon is inactive, in the User Type selection screen (after the Welcome and Alignment screens), choose Facilitator and then select the Connectivity icon to reach the Connectivity status screen.
-
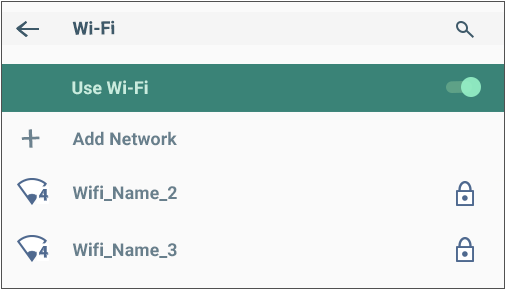
Make sure Use Wi-Fi is set to On, select a Wifi network, and key in the password.
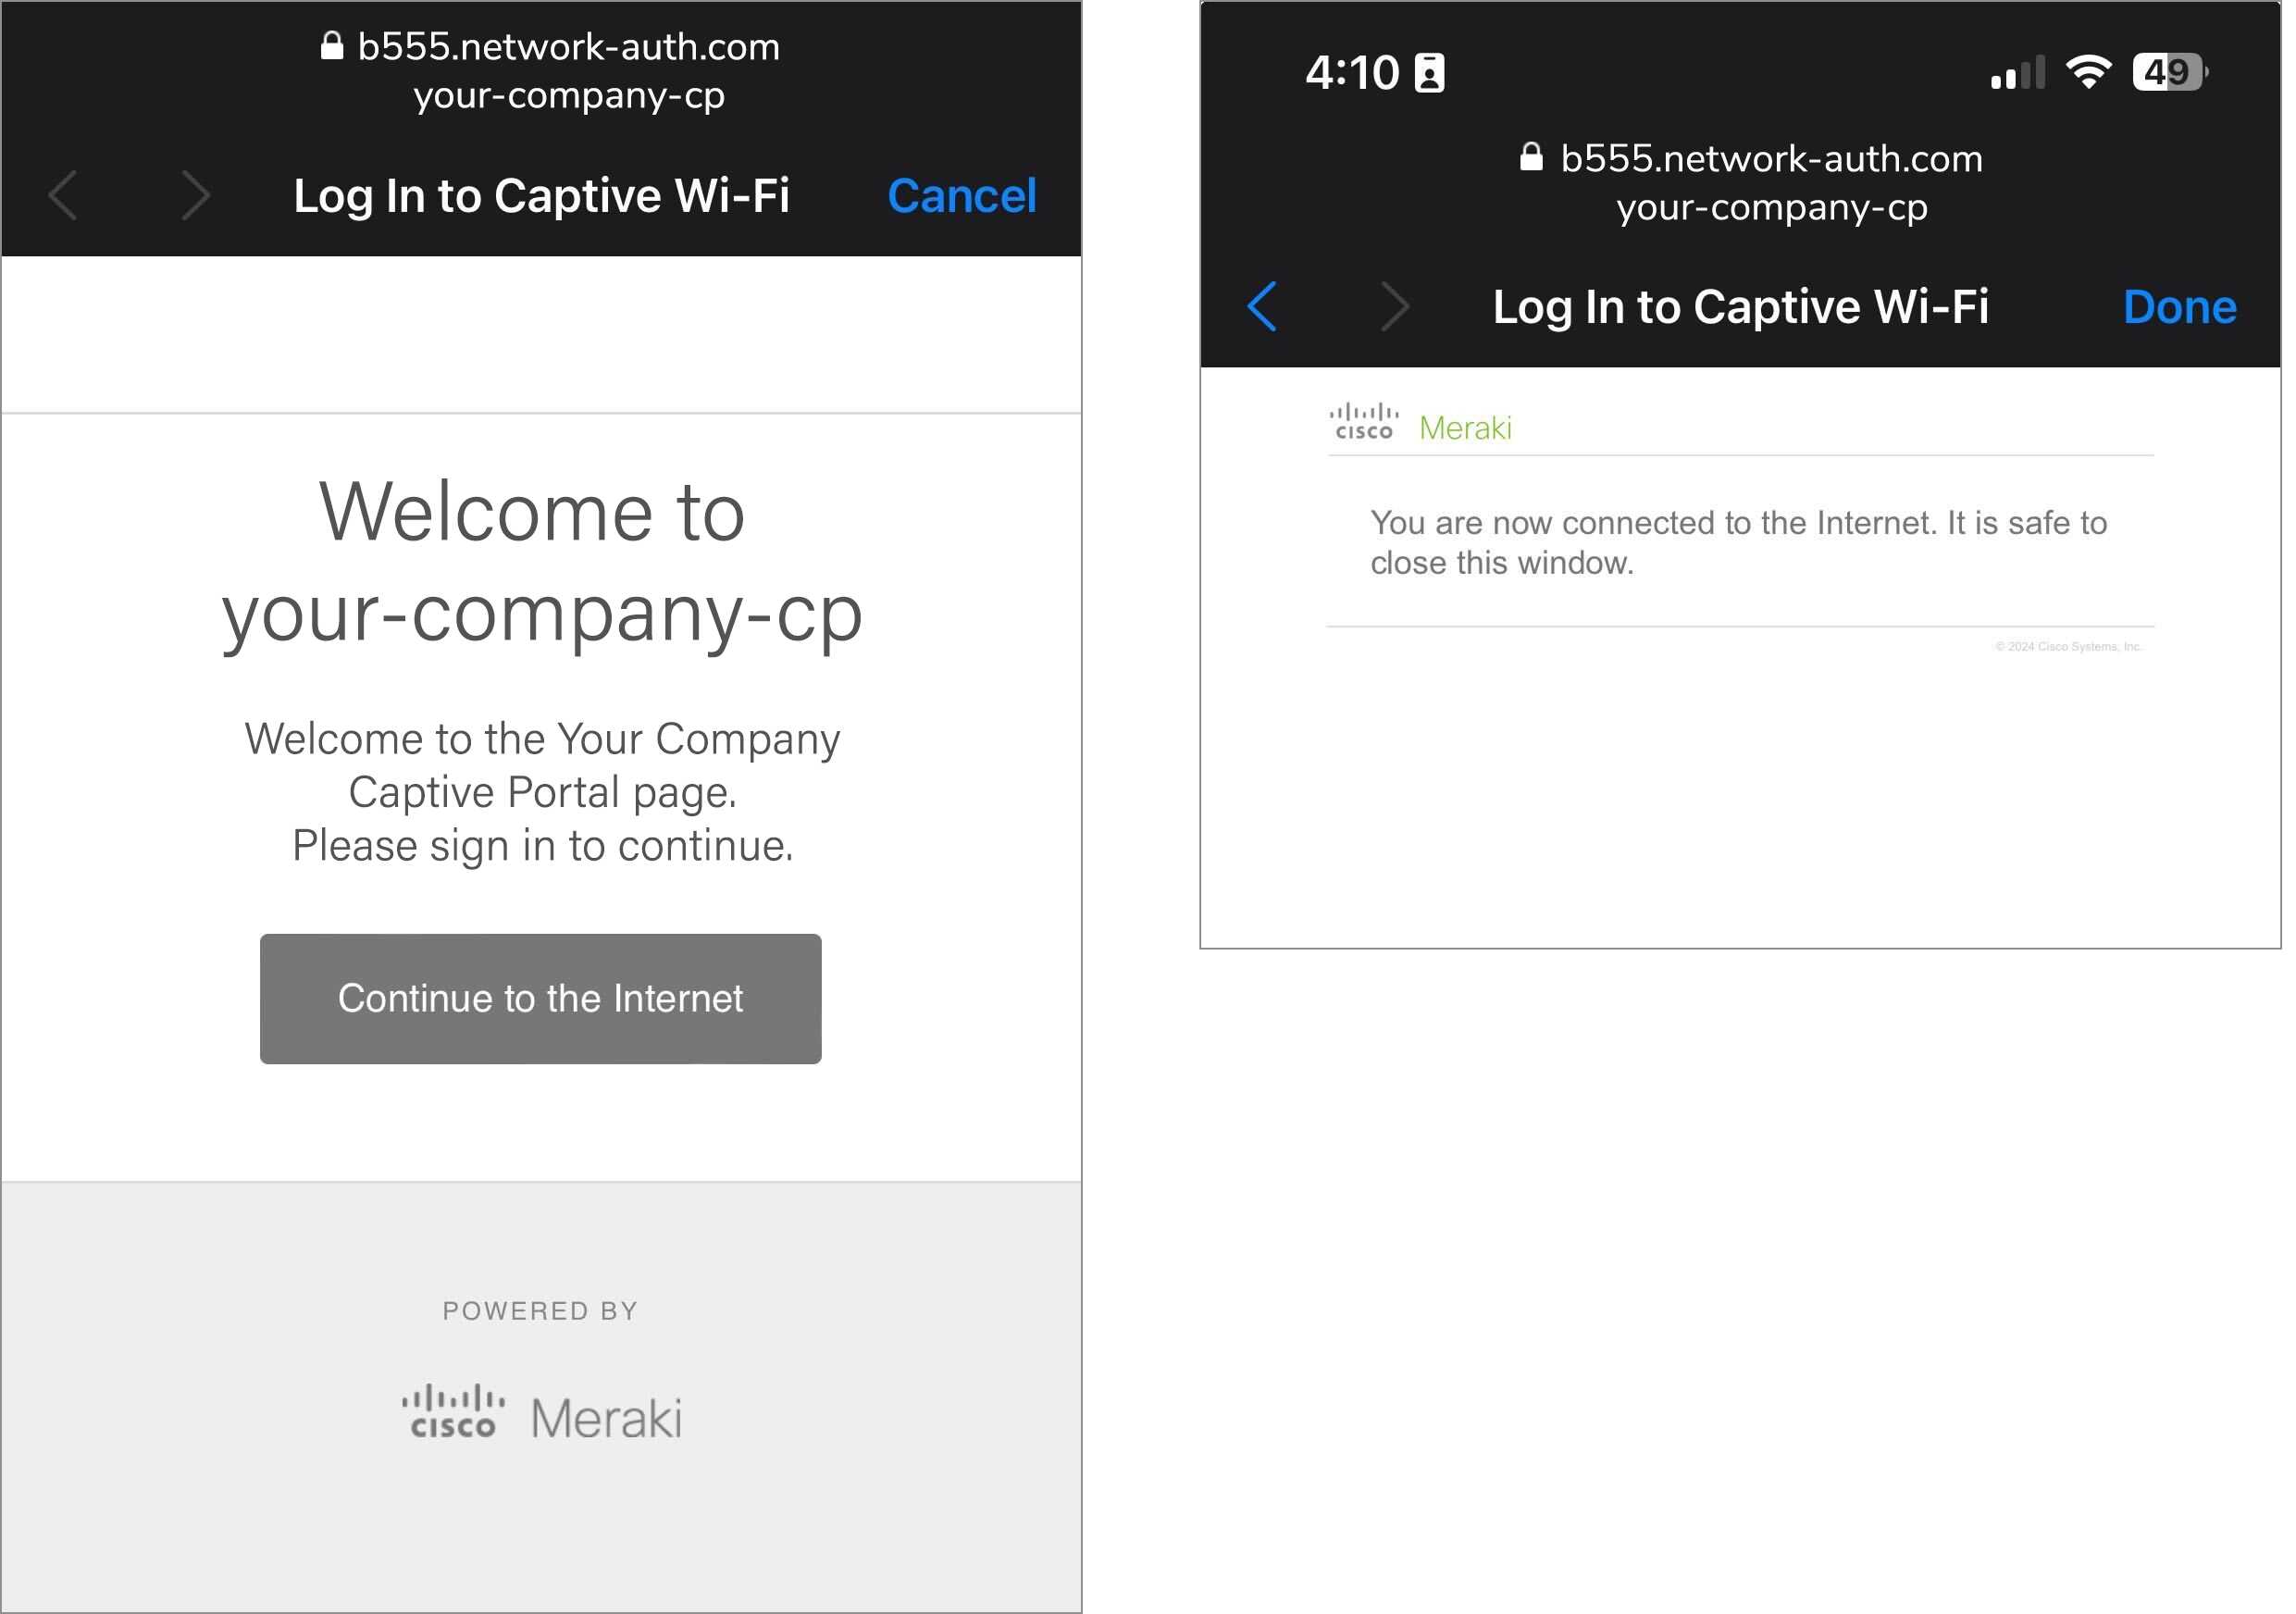
NOTE: If your company requires you to access the internet via a captive portal, you may see an additional login page where you are required to enter credentials or just select a button to access the internet.
Example captive portal screens
-
When you are finished, select the back arrow to exit the wifi screen.
-
-
 For Strivr Player versions before 3.10:
-
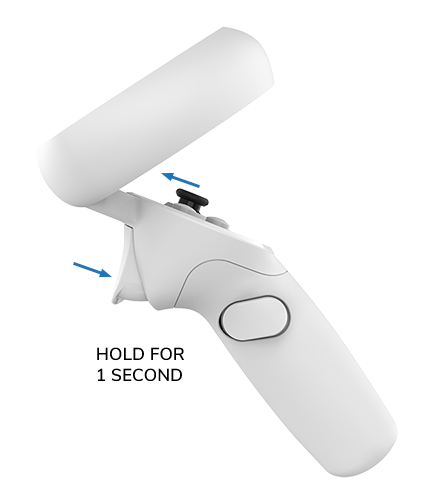
On the Pico Neo 3 controller, tilt the thumbstick UP and hold the trigger for 1 second.
-
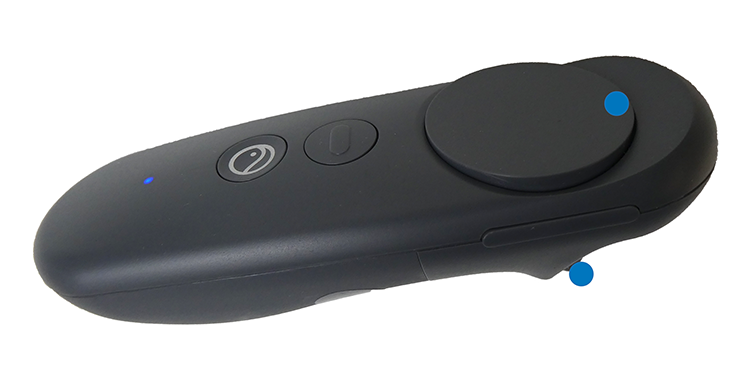
On the Pico G2 or G2 4K controller, press and hold trackpad-UP + trigger for 3 seconds.
-
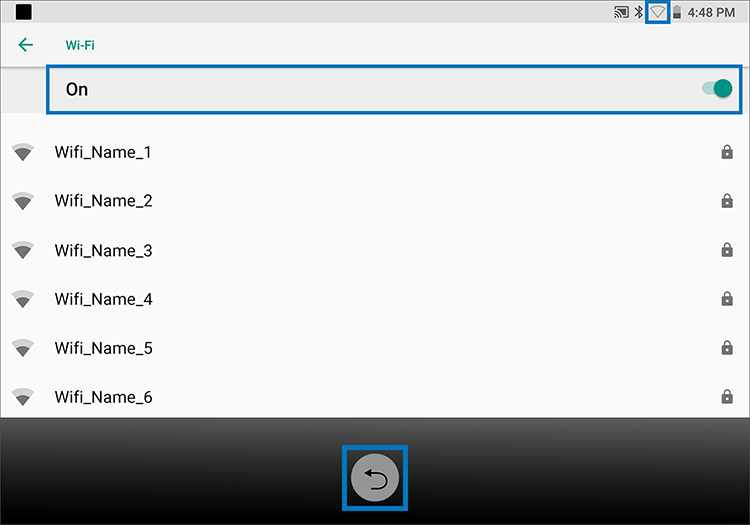
On the Wifi screen, make sure Wi-Fi is set to On. Then select your network and key in the password.
-
Select the return arrow button to return to training.
-