Creating a new experience
You can create a new experience when you first open Strivr Creator, and at any time from within Strivr Creator.
-
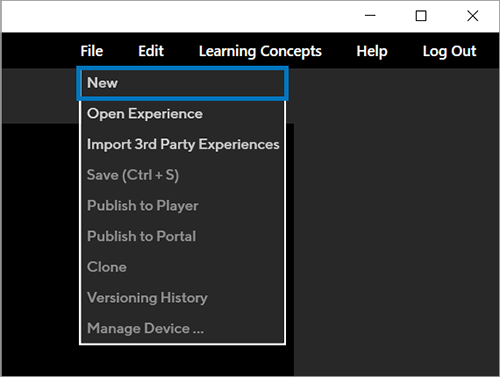
From the File menu, select New.
-
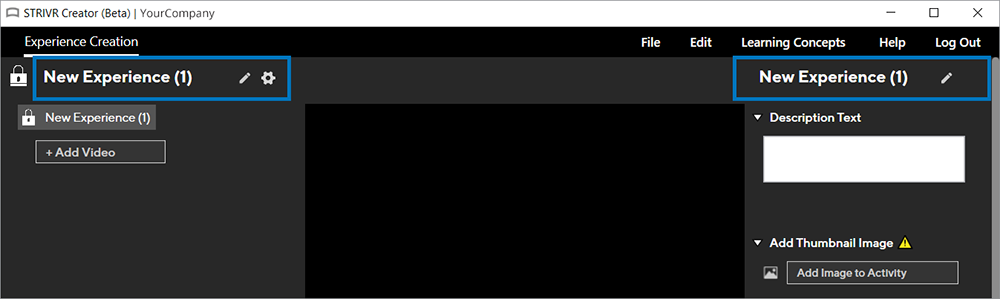
You’ll see New Experience at the top of the Tree view and in the Properties panel. Click New Experience in the Tree view to name your experience.
-
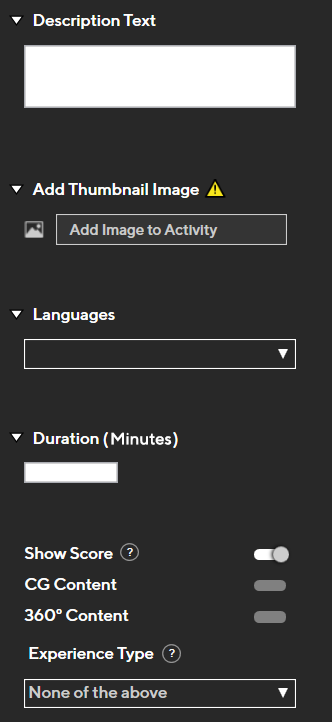
In the Properties panel, edit details for your experience.
-
Add Description Text. This text will show in the Content Library on the Strivr Portal and helps identify the experience. It’s important to add Description Text here because it cannot be added once the experience is uploaded to the Strivr Portal.
-
Add a thumbnail image by clicking Add Image to Activity. Images must be in PNG or JPG format, with minimum dimensions of 288px x 162px but cannot exceed 512px x 512px. For best results, images should be in 16:9 aspect ratio (width 16 to height 9). Images will appear in the Content Library and in learner headsets when they select a course.
-
Using the Languages drop-down, set the language for the experience.
-
Enter the duration of the experience in minutes.
-
Using the Show Score toggle, choose whether or not learners should see their score at the end of the experience.
-
Set the content type to either CG Content or 360° Content. This setting helps the Strivr Portal categorize each experience and is important for correct deployment.
-
Using the Experience Type drop-down, set the general type of experience. Learning Experiences teach the learner information while Assessments test a learner’s knowledge, either before or after they view a Learning Experience.
-