The Strivr Creator for 360 Video interface
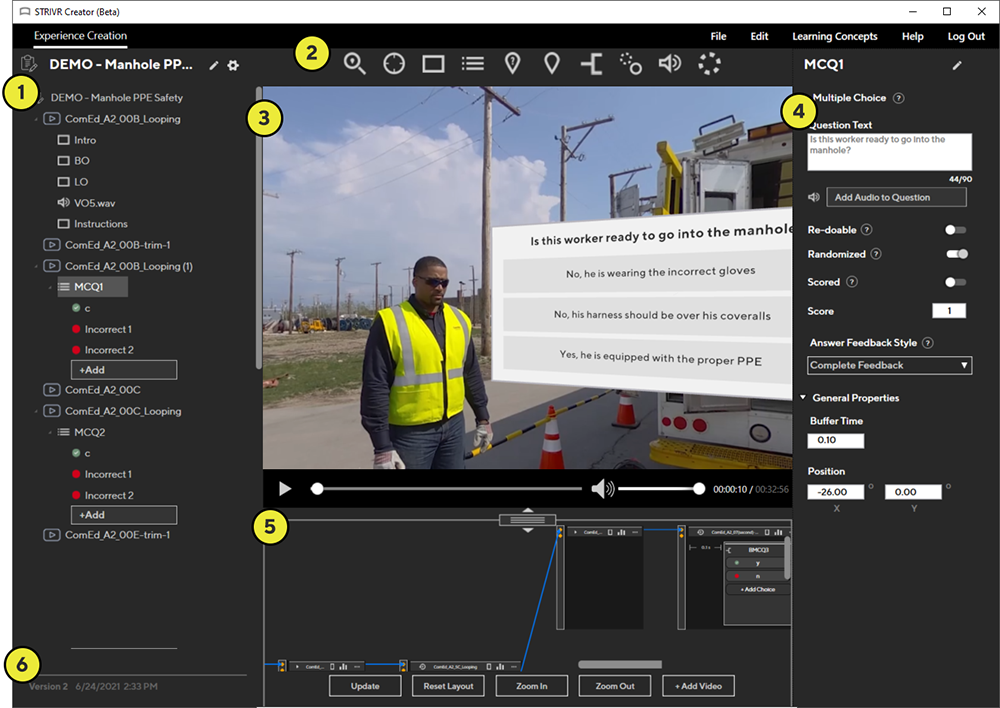
Let’s take a quick look at the Strivr Creator for 360 Video interface and get comfortable with Strivr Creator terminology. Here’s an Experience being edited. Note that you can find help at key areas of Strivr Creator for 360 Video—look for the ![]() icons.
icons.
-
On the left side of the screen, the Tree view lists clips included in an experience and, indented under each video, events added to those clips.
-
In the Event bar at the top of the screen you’ll find commands to add events like Overlays, Multiple Choice Questions, and Sounds to the selected video.
-
When you select a level of the Tree view, the relevant video displays in the preview window in the center of the screen. Within the preview window you can click and drag the video to any angle. And at the bottom of the preview window you’ll see the timeline with play and pause controls.
-
When you select a video or event in the Tree view, you’ll see the properties of your selection in the Properties panel on the right side of the screen. In the Properties panel you can modify event properties like start times, event labels, and more. For properties that are controlled by a toggle, the right position turns the setting on and the left position turns the setting off.
-
The Map view under the Preview window shows a high-level flow of how videos and events connect in the experience. Click and drag within the Map view to scroll, and use the buttons at the bottom of the view to zoom in and out. The Map view can be resized or hidden using the bar at the top of the view.
-
On the bottom left of the screen you’ll find version information for the Experience.